Ever since writing became my career, I’ve made efforts to keep it from being my primary hobby. Sure, I still write for fun – making it the second best thing I do with my time (after spending time with my family, of course) – but the idea of expanding my horizons beyond writing for work and fun was something I wanted to explore — and do it in a way that would be both efficient and effective. I am, after all, a productivityist.
When I was finished exploring, I came up with two hobbies that interested me: cellaring beer and genealogy. But when those two went head-to-head, cellaring beer won out.
I started to do some serious research right away (here’s a great starting point courtesy of Imbibe Magazine), and prepared my old office in the basement (which was never ideal for an office anyway) for the transition to my beer cellar. I bought a humidity meter, mapped out where shelving would go, and was on my way. But I needed something to chronicle the growth of my cellar’s inventory.
That’s where Evernote came to mind.
I’d listened to Gabe Weatherhead’s Generational podcast – the one where he conversed with Ken Weingold – and began to look at some of the options out there. In the end, I figured I could make something I was already proficient in work for the purposes of my new hobby…and I was (mostly) right.
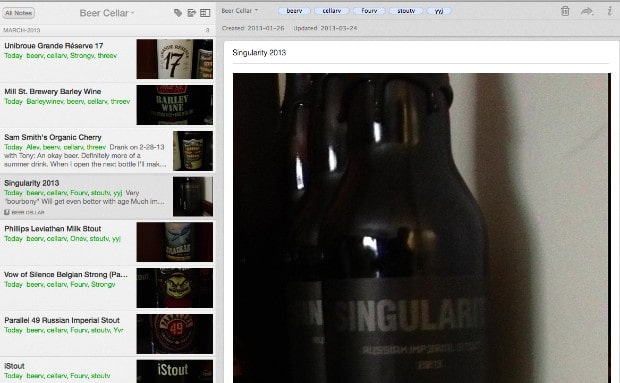
The photo option in the iOS version of Evernote made it easy for me to take pictures of the beers as I added them to my collection. I name the note with the name of the beer and I’m also sure to date them on the date of purchase so I could see how long they were in the cellar. Since I was buying two of each type at once (which is the minimum you should do – drink one early on and then keep the other for a lengthy period of time), when I modified it, I’d see when I drank the first bottle. I’d only modify it when I’d add tasting notes, so by the time I decided to drink the final bottle, I’d already have all the notes I needed in place.
But tagging is the key to using Evernote for tracking a berr (or wine) cellar.
I would tag the beers using a similar tagging system I use on other notes and notebooks, chronicling things like alcohol content, type of beer, and more. For example, here’s some of what I use for various types of beer:
- Stout = stoutv
- Porter = porterv
- Barley Wine = barleywinev
- Strong = strongv
As I add more to my collection, I’ll add more tags that can easily filter out what I want to drink versus what I don’t want to drink at that time. One of the things I’ll add is country of origin, but for now I don’t have a large enough collection to warrant that. Right now I’m using “yyj” for anything from Victoria and “yvr” for anything from Vancouver (or the Lower Mainland). These are the only tags I use that don’t have the “v” at the end of them because airport codes are already a code of sorts; there won’t be any confusion about them in Evernote as I add more items to the mix because the codes themselves aren’t words.
I’m also using a rating system for ranking the beers in terms of taste. I’m essentially using the same system I use on Untappd in order to remove any friction between using Evernote and the social networking app in terms of data entry. The difference is that I use the numbers spelled out (onev, twov, threev, fourv, fivev) so that the tags don’t get lost in searches. You may not want to go this far, but because Evernote allows for multiple tags I can add as many as needed for each beer as the inventory grows.
I’ve even added audio to notes as I drink each one so that I can better chronicle tasting notes. You can easily add audio notes to an existing note on the Mac version, as well as on the iPhone version. This feature allows for quick capture of my thoughts on a beer without having to remove myself from the overall experience by taking time to type out my notes. Since Evernote allows you to add multiple audio notes within a single note, I can also see how well each beer ages.
I can also add multiple photos, meaning that I can show how the beer looks after pouring. I haven’t done that yet as my glassware collection leaves a lot to be desired. There’s also the option to add links to the brewery website, as well as to whatever other websites I want (like RateBeer, for example).
I’ve only begun to scratch the surface as to what Evernote can do for me in this use case — and I’ll likely modify how I use it as my hobby develops even further. But I’m going to stick with it because with this versatile app I’m already in very familiar territory, and I know there’s going to be a lot more I can do with it as time goes on – and as my beer cellar hobby (and inventory) grows.
If you’ve got any suggestions on how I could improve my Evernote use for beer cellaring, I’d love to hear them. Just leave me your suggestions in the comments.